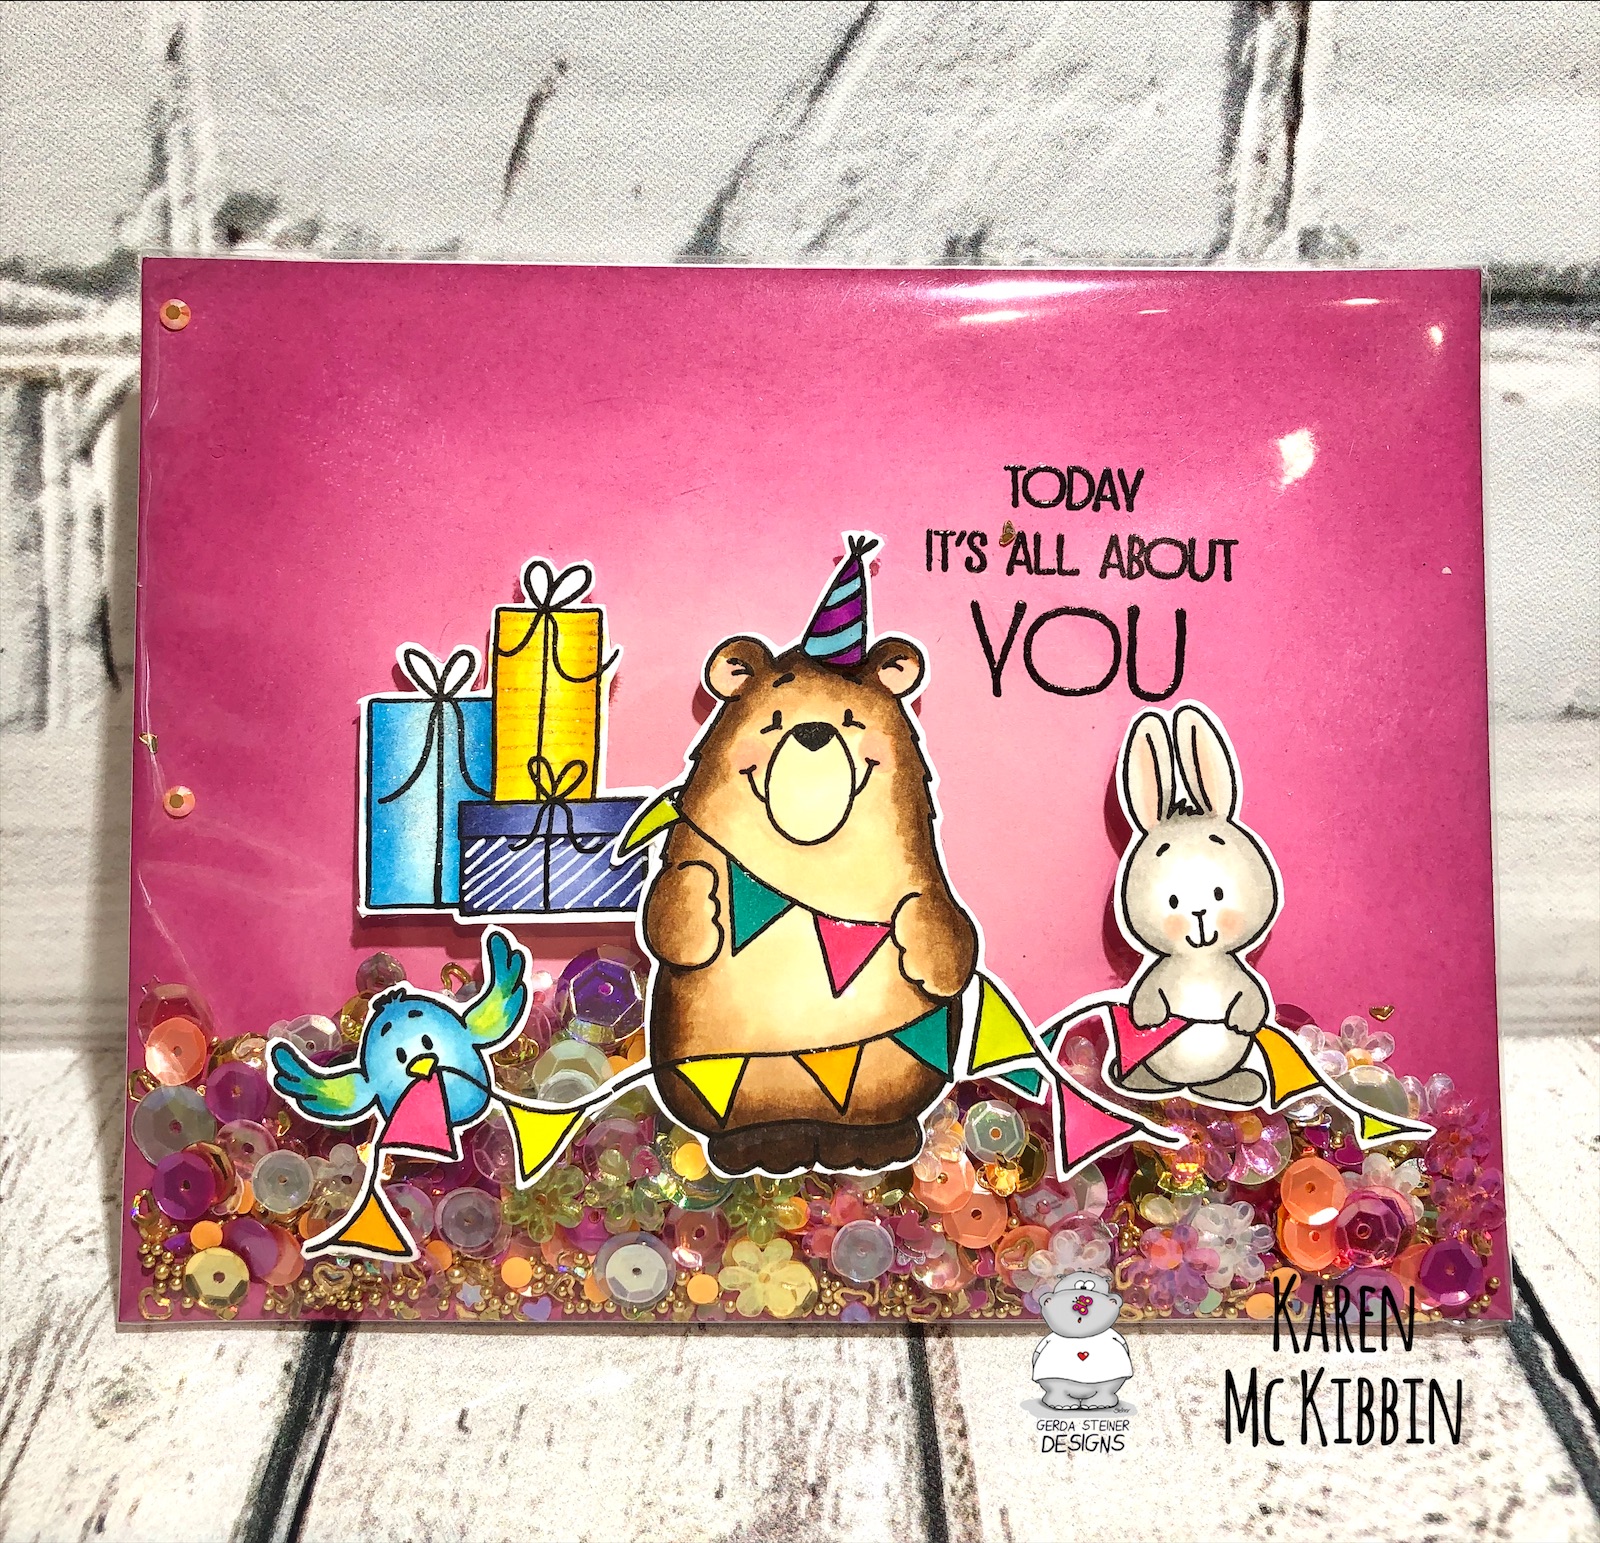
Birthday Bear Shaker card by Karen
June 17, 2020
Hello everyone, it’s Karen here today and I’ve got a full size shaker card today made with a new stamp set from Gerda Steiner Designs called “Birthday Bear”. This is an easy card to make and it even uses a surprise material!
If you would like to see a video of how I made this card on YouTube, please
CLICK HERE
I coloured in my images with Copic markers and then applied some Glossy Accents to the banner flags, the bear’s hat and the balloon. Once that was dry, I fussy cut out my images.
On an A2 size piece of pink cardstock, I ink blended some Distress Oxide inks around the edges in Picked Raspberry and Seedless Preserves. Once the ink was dry, I used an anti-static powder over the whole card front. I find that helps the shaker material move better, and I wanted to heat emboss my sentiment on the card front. After deciding where my images would go, I stamped my sentiment and heat embossed it with clear embossing powder.
Now for that surprise material! I save the cellophane envelopes that all our stamps and dies come in and use this for full size shaker cards. I cut out a rectangle from a cellophane wrapper that was approximately an inch wider than my card front all around. I centered this wrapper on my card front and then flipped them over. I used my tape runner to run a piece of tape along the bottom edge of my card front and then folded the wrapper up onto the tape and pressed it down. I repeated this with the 2 sides as well and trimmed down the excess wrapper in the corners. Now you have a pouch that is open at the top and can be filled.
The images on the front of the card can either be glued inside the pouch (in which case, adhere them before assembling the pouch), or they can be glued to the front of the pouch. I chose to glue mine to the front on the cellophane wrapper. I find it easier to do this before I fill the pouch because everything is flat at that point. Once they were glued down, I filled my pouch with shaker bits. Then, the top was adhered on the back with tape runner again and the corners trimmed. I don’t pull the last wrapper edge quite as tightly as the other edges, as this allows a bit of room for the shaker bits to move around freely.
I adhered the shaker pouch to my card base with my tape runner and then stamped my inside sentiment. I finally added the adorable bear arm with the balloon to the inside along the edge of the card, and trimmed off the excess. How much fun is that bear arm?!
This is a very quick and simple card, but it is so much fun to shake up and see all the inside bits move around. I hope you’ll give it a try!
Leave a comment
Comments will be approved before showing up.