Embossed Christmas Card with Video
September 08, 2020
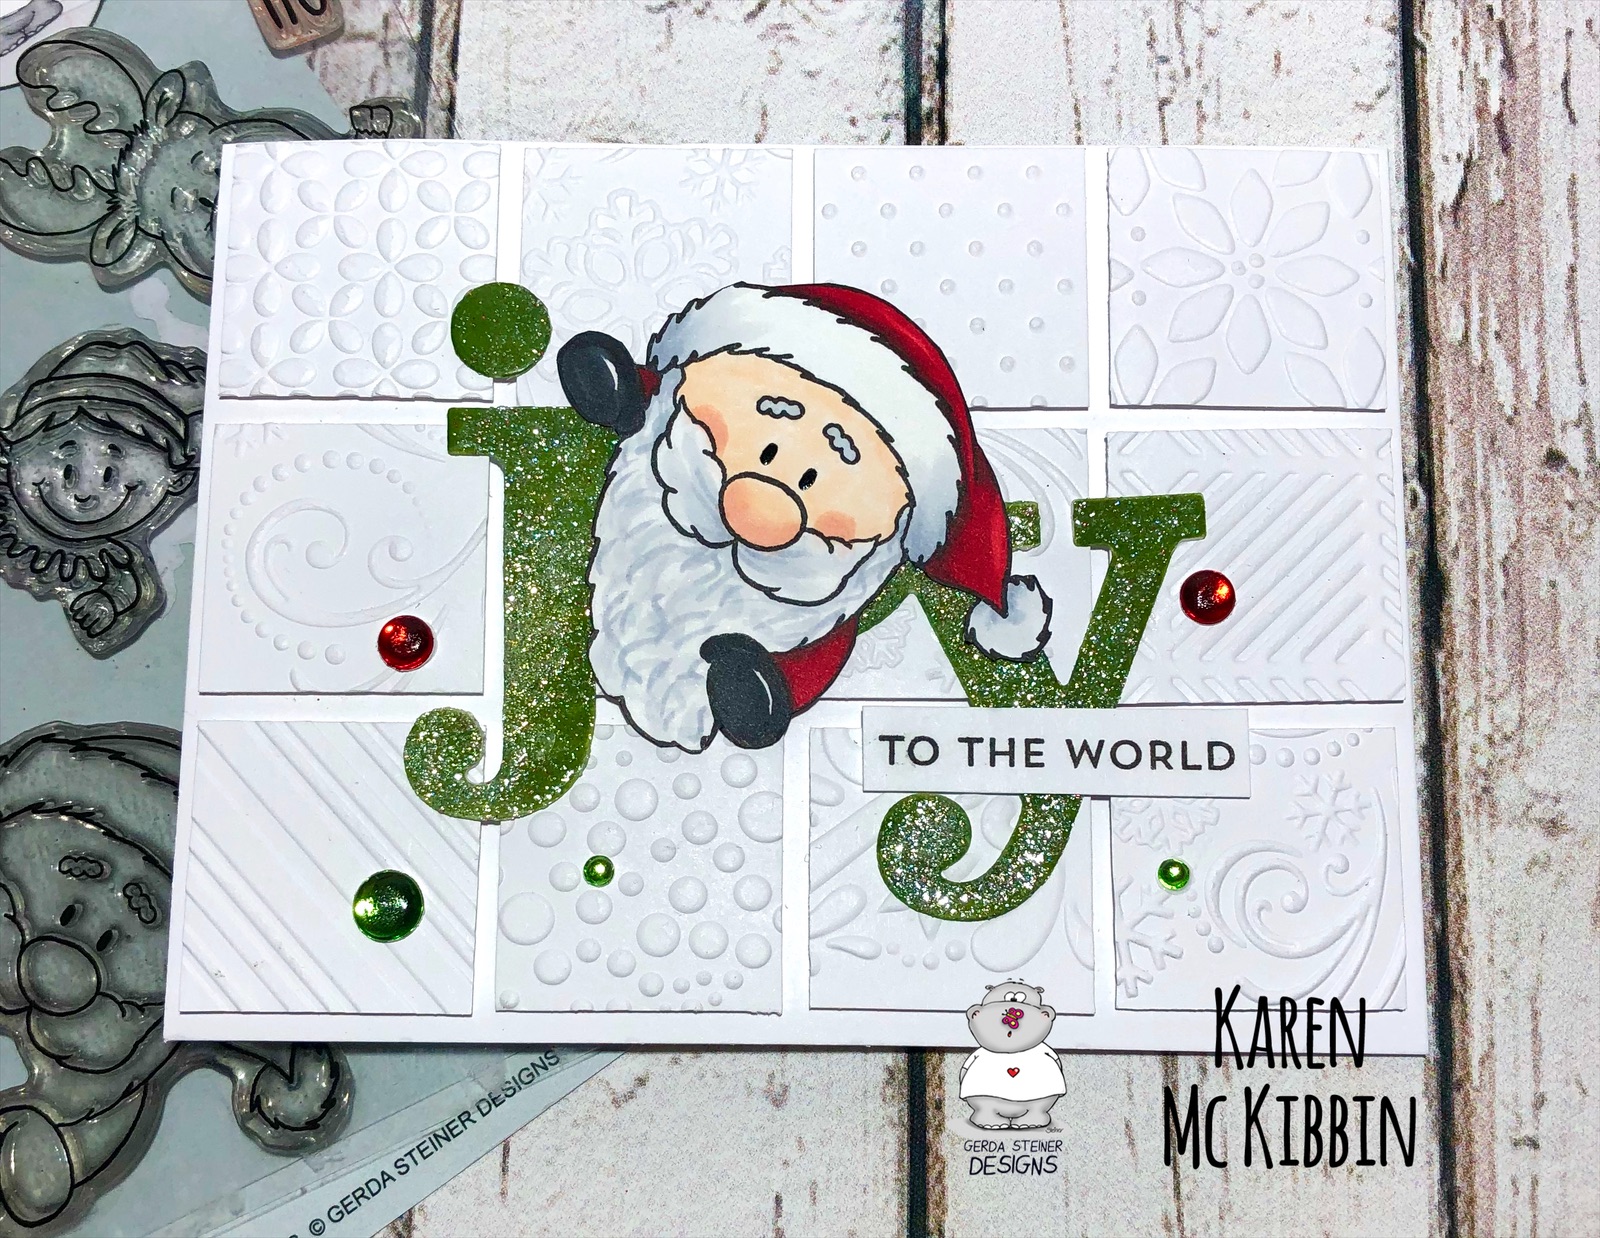
Hello and welcome, it’s Karen here today. I’ve got a very textured, embossed Christmas card to share with you today. This card was completely inspired by my recent re-organization of my embossing folders!
I’ve got a YouTube video of how I made this card, so to see it in HD please CLICK HERE
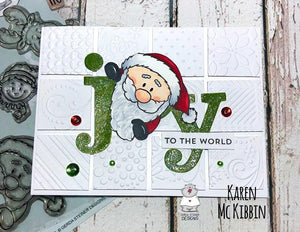
I stamped the Santa image from the “Peeking Friends” stamp set from Gerda Steiner Designs and pencilled in the rest of his beard. I used a Copic multiliner pen to go over it and erased the pencil marks. Then I coloured my image with Copic markers (listed below) and fussy cut it out along the lines. I used a black marker pen from EK Tools to colour along the edges.
Next, I diecut the word Joy from white cardstock. If you have a nice green cardstock or glitter cardstock, that would be even easier. I was given this die several years ago and it was second hand at the time, so I don’t have the product information to give you. But any large Joy or Noel die would work here, even alphabet letters. I had to do some partial die cutting on the “O” to make it wide enough for Santa to not obscure the “Y”. I coloured the word in with a Copic marker, and went along the cut edges too. To add some interest to the word, I heat embossed it with clear embossing powder and sprinkled some glitter on while it was still warm. I did this 2-3 times for even more depth.
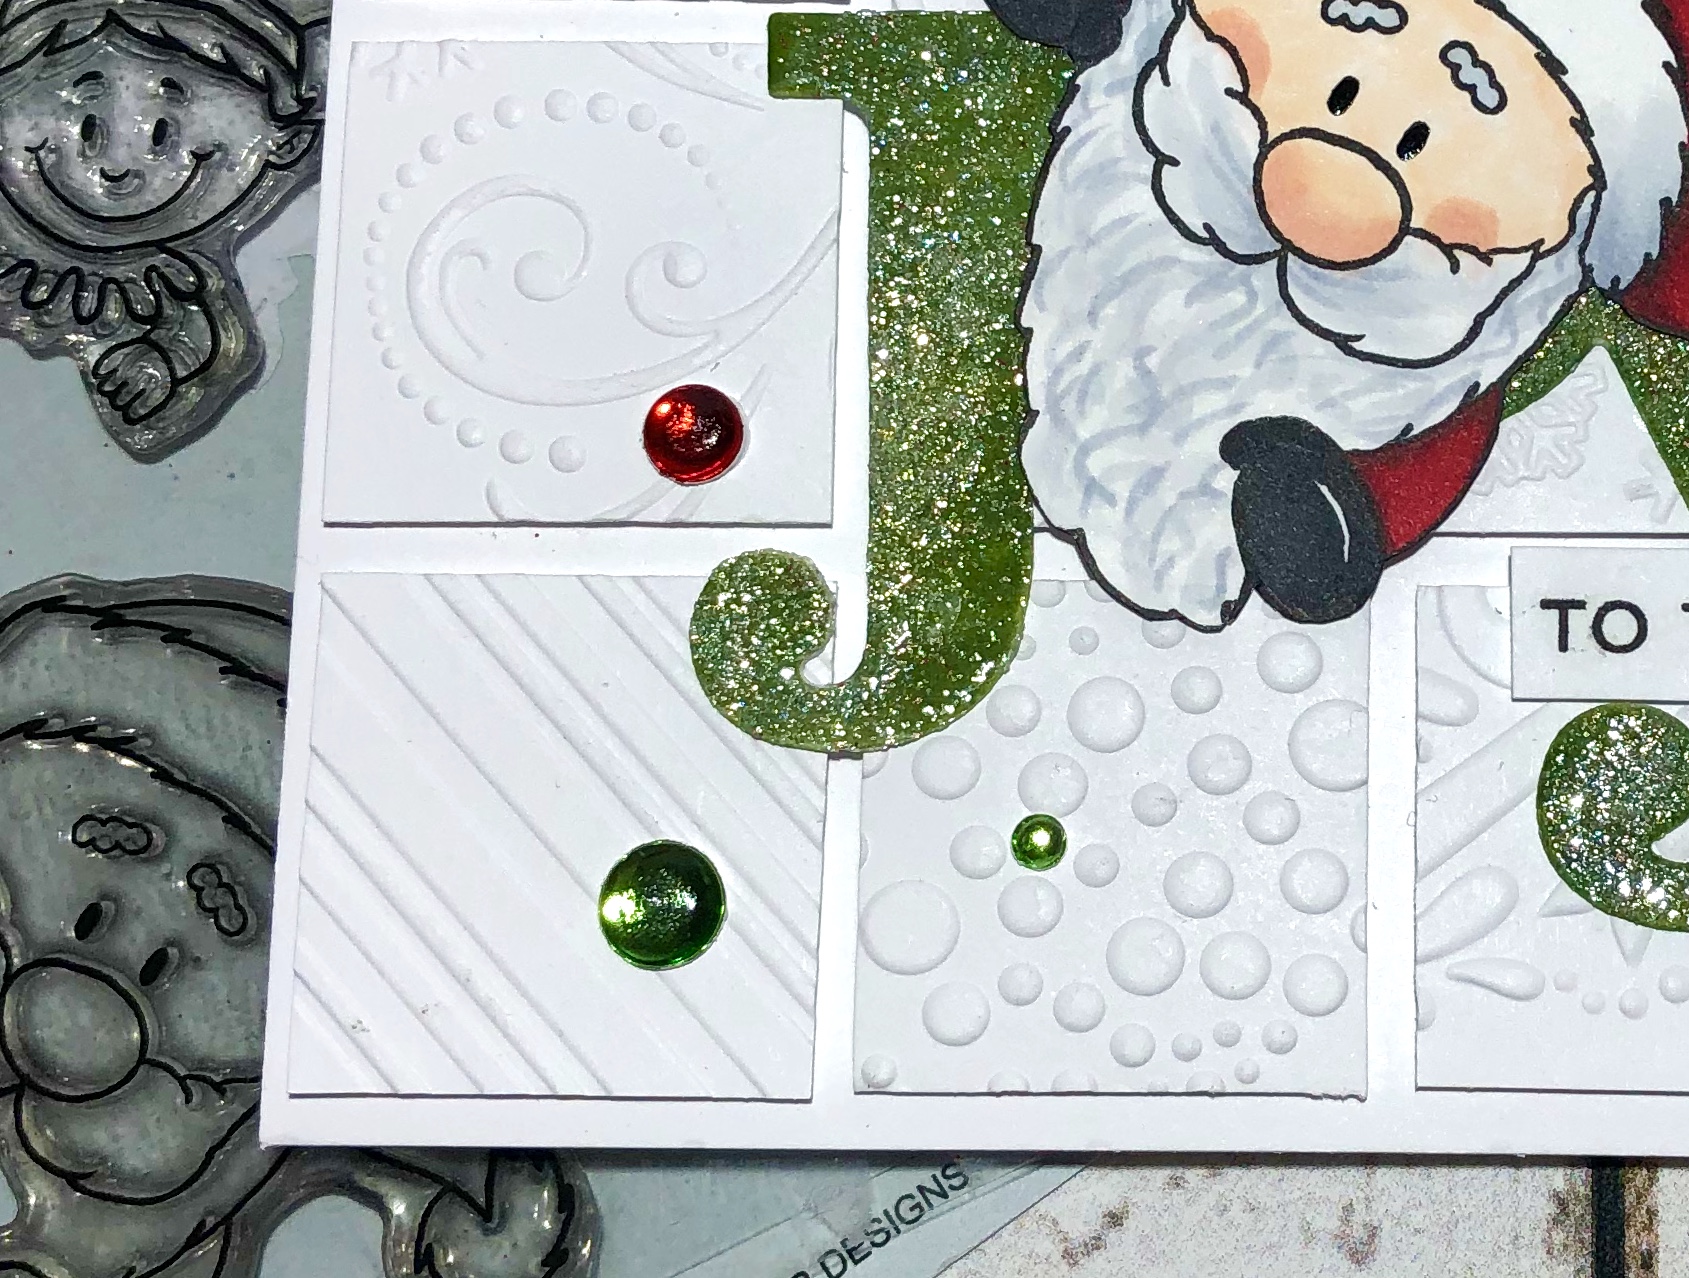
When I reorganized my embossing folders, I die cut tags and embossed those to use as a reference for all my folders. The tags were so pretty and full of texture, that it inspired me to make this card. I cut out 12 - 1 1/4” squares from white cardstock and then used different embossing folders to emboss the squares. Sometimes, I used different areas of the same embossing folder so you don’t even need that many folders. I mounted these squares on foam tape and then adhered them as evenly as possible on my card front. I had thought I could use my T-ruler, but with the foam tape, this was not really possible. In the end, I just spaced all 12 squares out on my card front and carefully adhered them in position. I used glue to adhere the Santa to the word Joy and then onto the card front. I used the “to the world” sentiment from the MFT stamp set Bitty Holiday Wishes and trimmed it down to fit over the”Y”.

Since I don’t have any bright green or red embellishments, I created my own by using different sized circle punches to cut out circles from red and green foil cardstock and covered those with glossy accents.
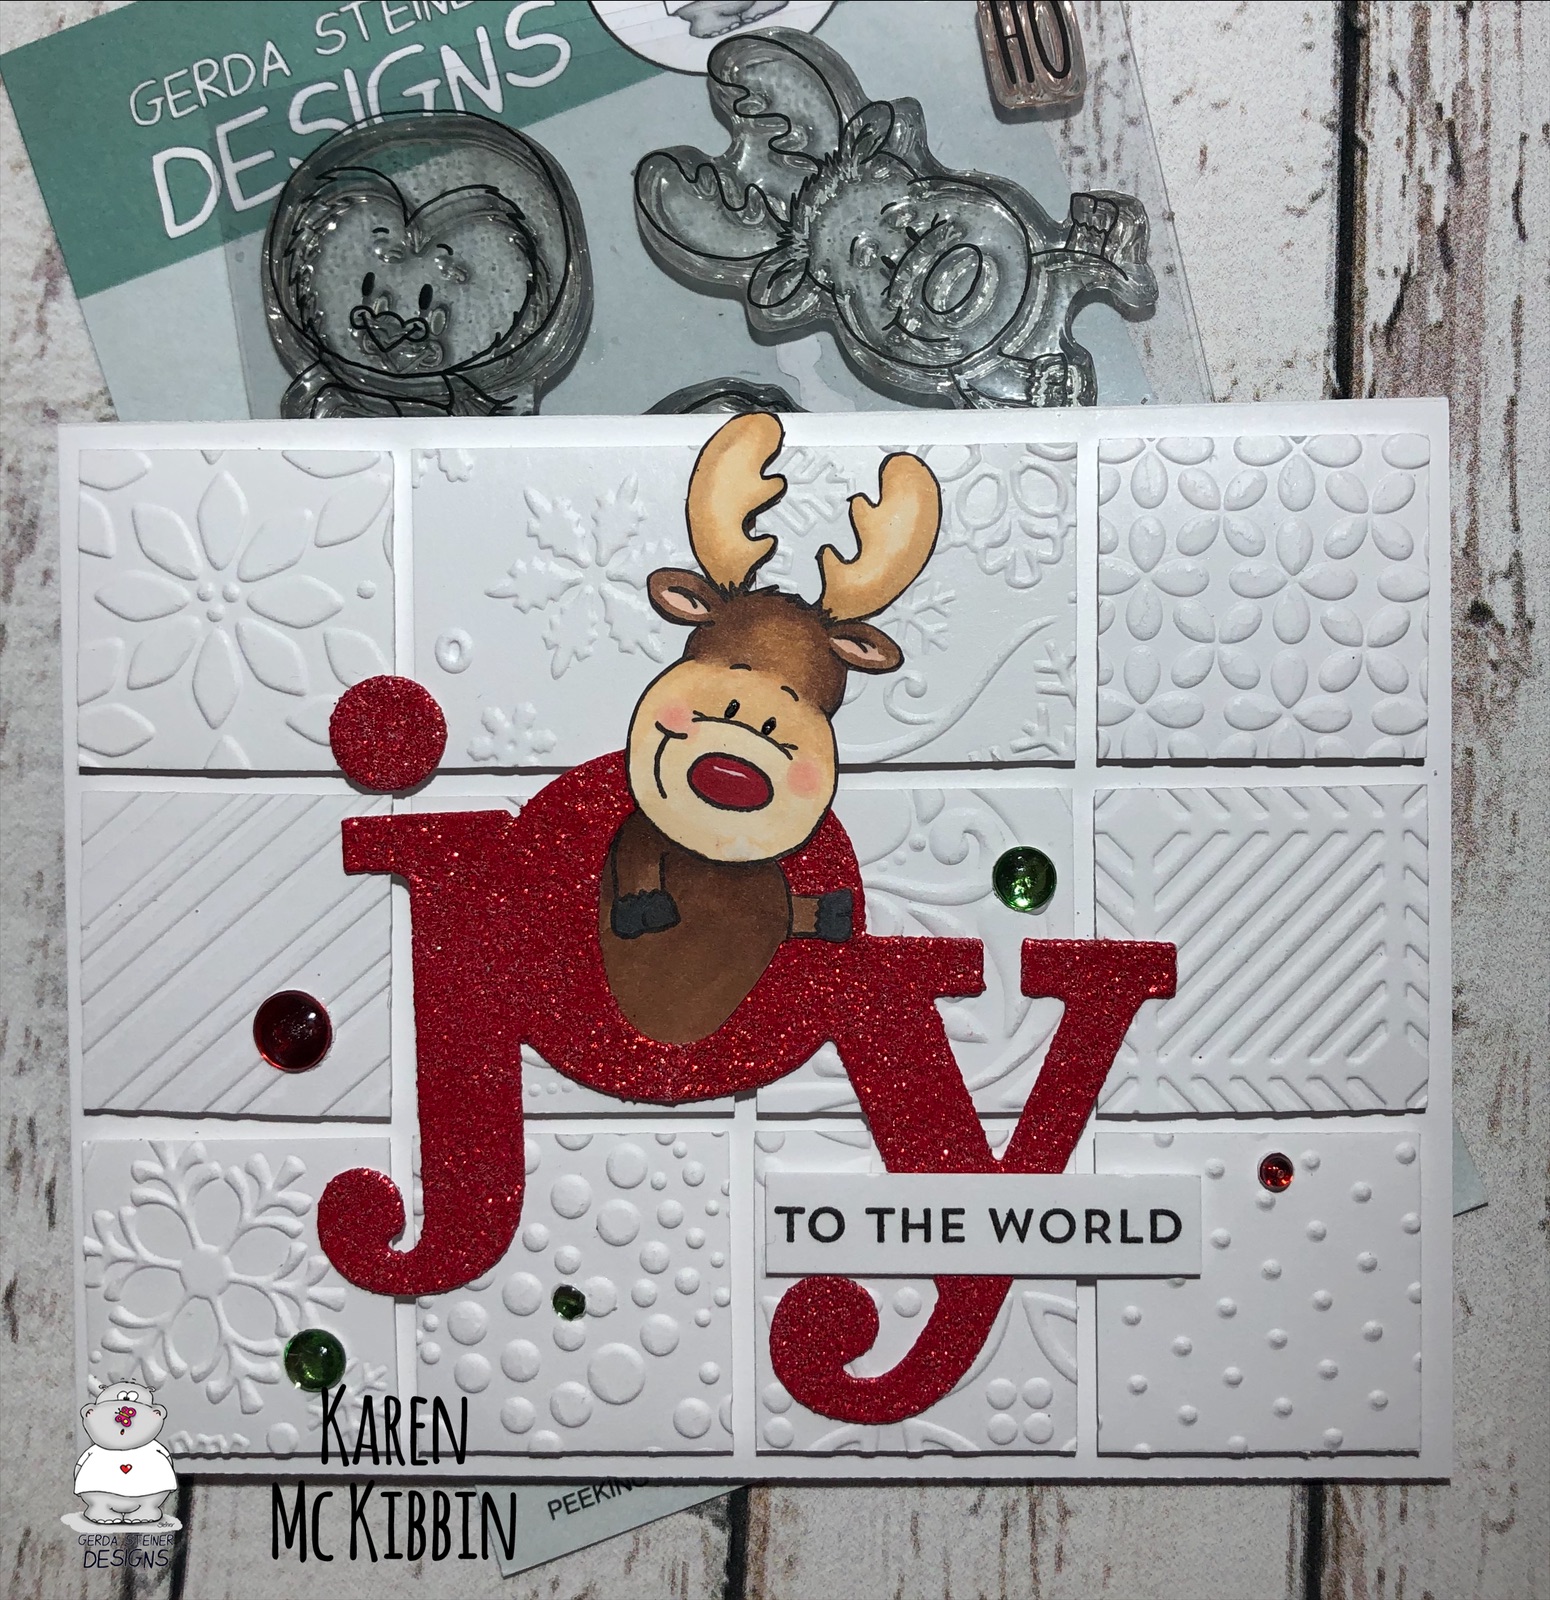
I made a second card with the reindeer image and cut the Joy out of red glitter cardstock. These cards have just got so much fun texture in them and I hope you’ll give this a try!
Copic markers used: E000, R00, R20, C0, C1, C2, N6, R39, R29, R35 for Santa. G94 for the word Joy.
Leave a comment
Comments will be approved before showing up.