You can also get
matching dies that coordinate with this set -- making creating super easy!
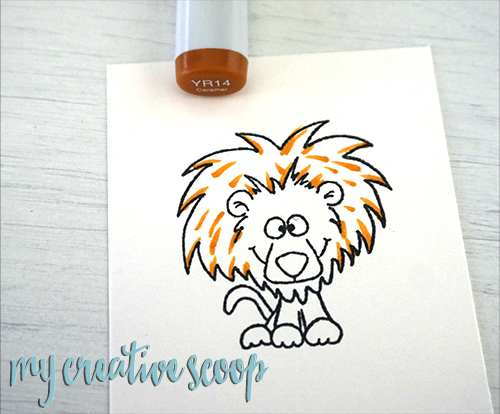
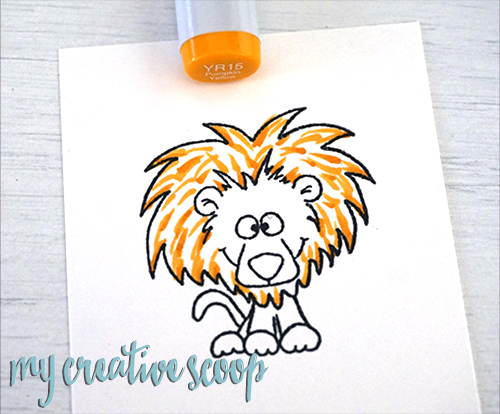
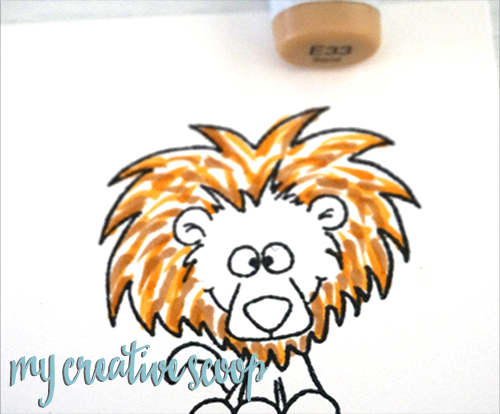
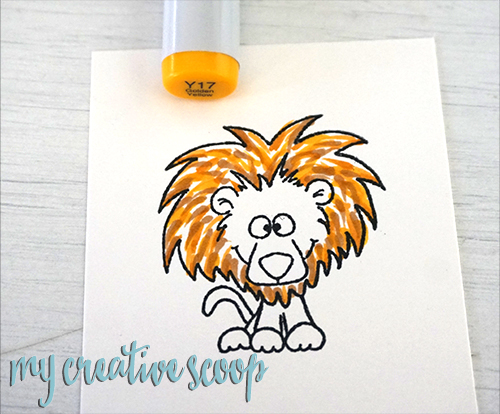
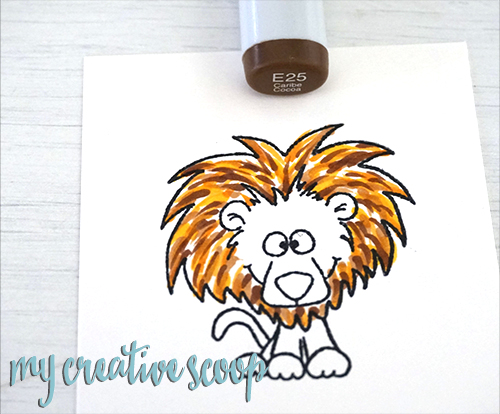
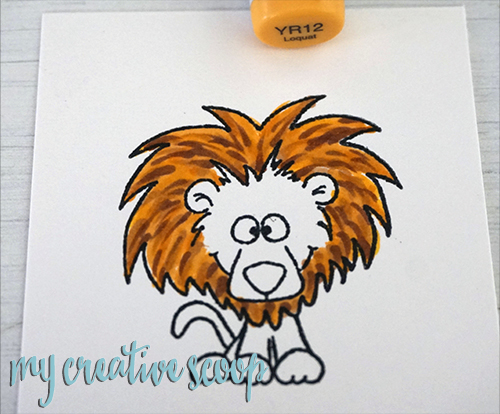
Ok, let's start the tutorial. Each new colorI use is in the photo making this Copic Marker Tutorial super easy to follow. :)
Since the stamp is...
Continue Reading
Hi Everyone!!
Kimberly from Kimberly Crafty Spot here today as a guest designer.
Today I am sharing another card using the newly released
This blog post contains affiliate links.
For the card, I wanted the animals to look like they were peeking out. So I stamped, colored and fussy cut the animals from the set then paper pieced the gift and cake, also...
Continue Reading
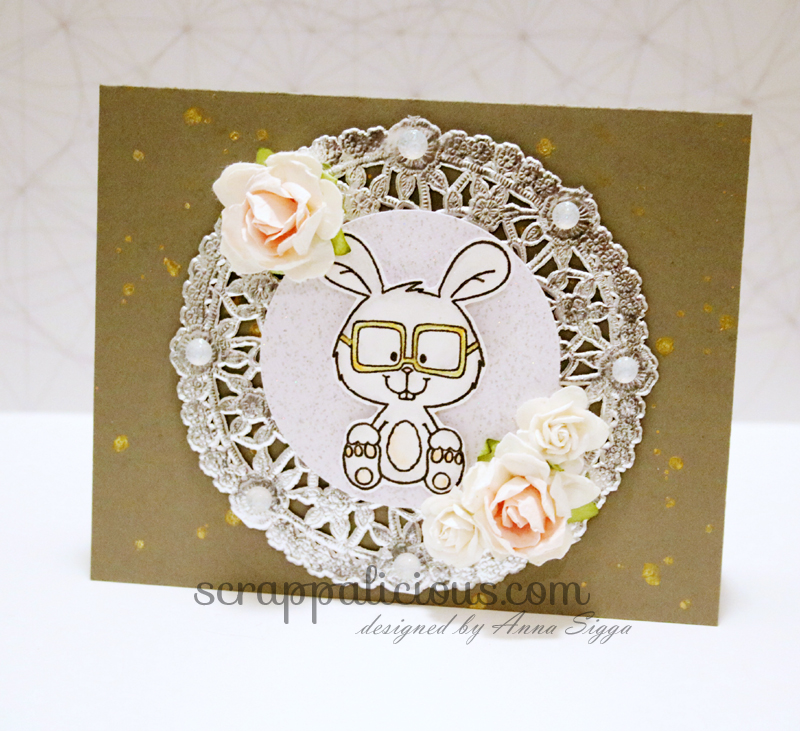
It's
Anna Sigga here today and I have another card using the adorable
Nerdy Easter Bunny stamp set.
This bunny is so darn cute and I love that even though this set is meant for Easter it works for any occasion cards.
I colored the bunny using my Zig Clean Color Real Brush markers and I kept him on the soft side. Then I was unable to control myself and I just had to add a dash of sparkliness to the...
Continue Reading
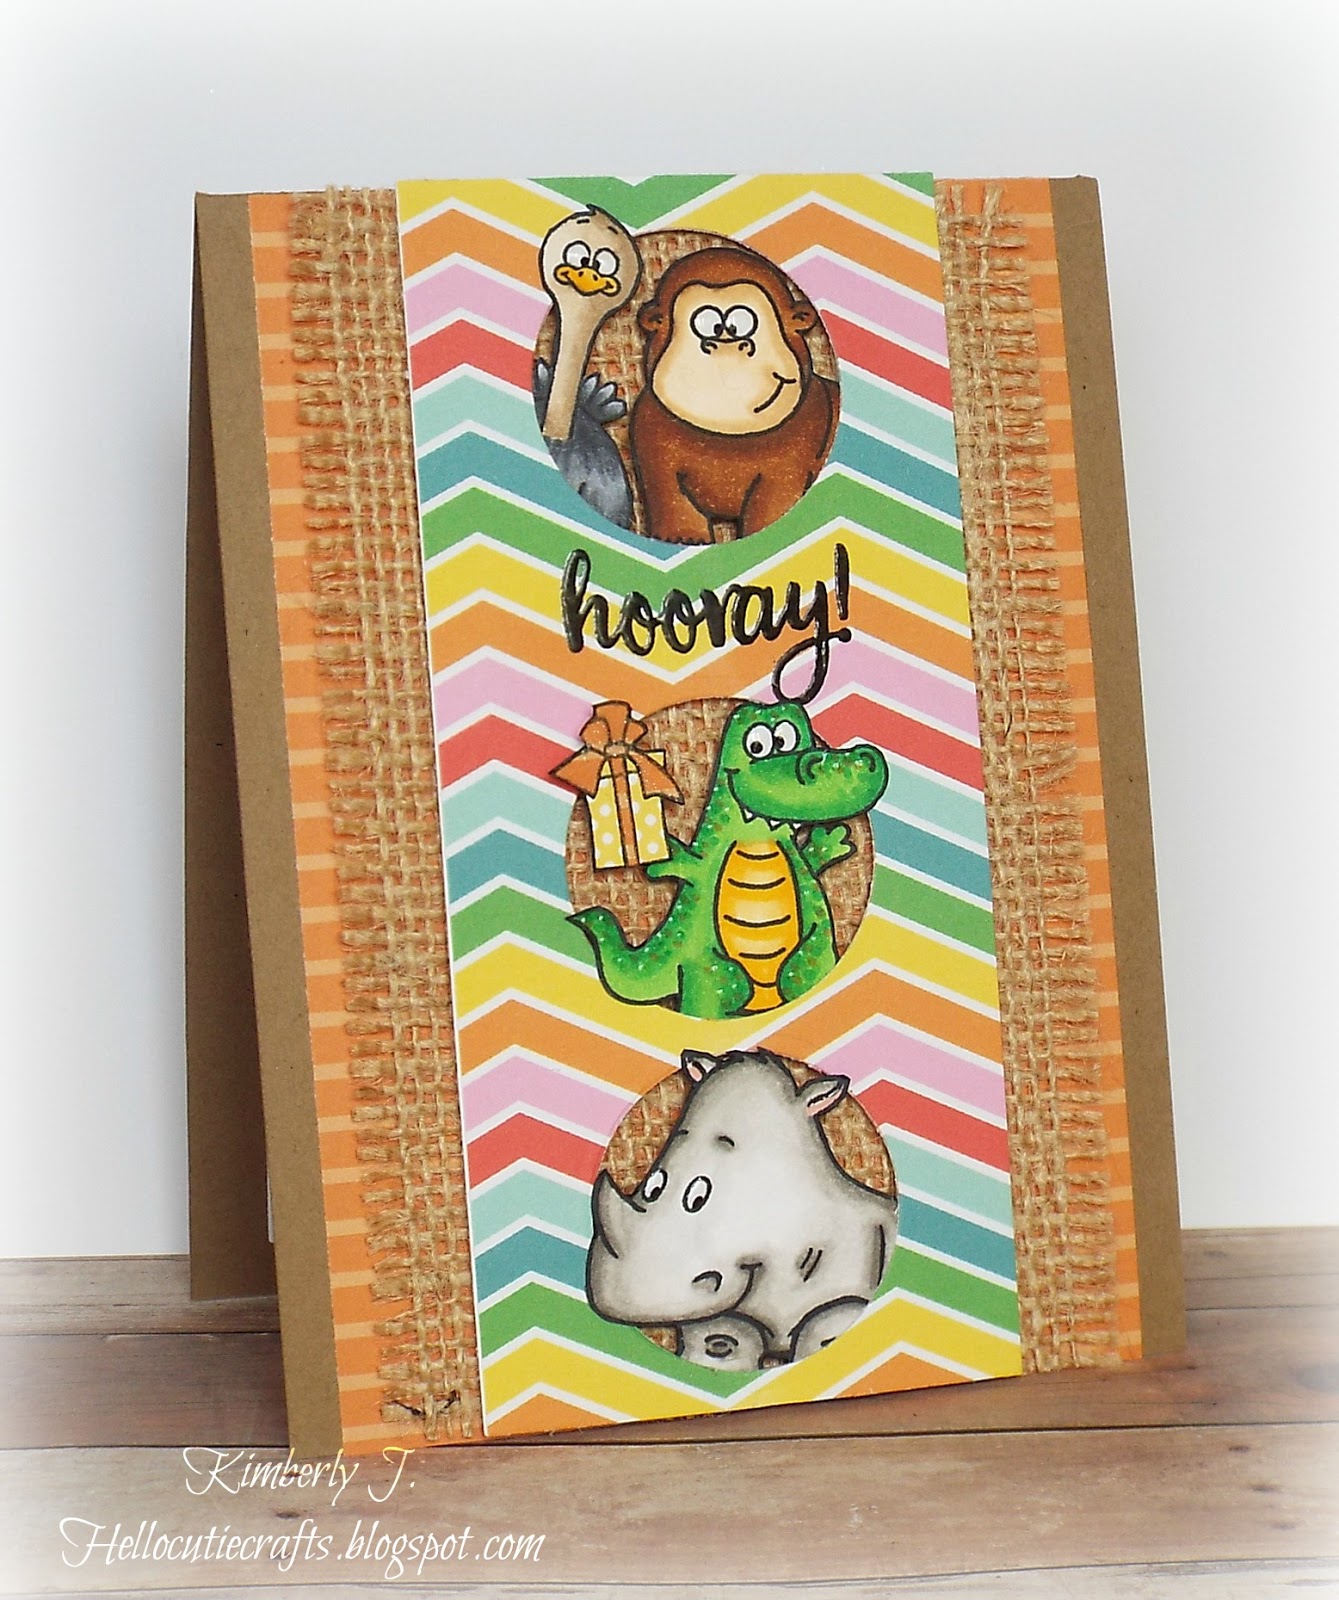
Hi Everyone!
Kimberly from Kimberly's Crafty Spot here today as a guest designer.
Today I am sharing a card for the upcoming release on March 22nd.
Aren't these critters just so fun??
I started the card by stamping the cake, using some post it notes and masking the cake then stamping the lion to the left and the...
Continue Reading
Hi there everyone!
I'm Diana from
Moments of Creativity and this is my last post as a guest designer for this fabulous team. That is why I decided to greet you all with a cheerful card which will come in handy for any birthday and is very easy to make:
Now let's get right to 10 steps which will help you to create such a card:
1. Start off by cutting 3 circles on your panel.
2. Once this is done,...
Continue Reading
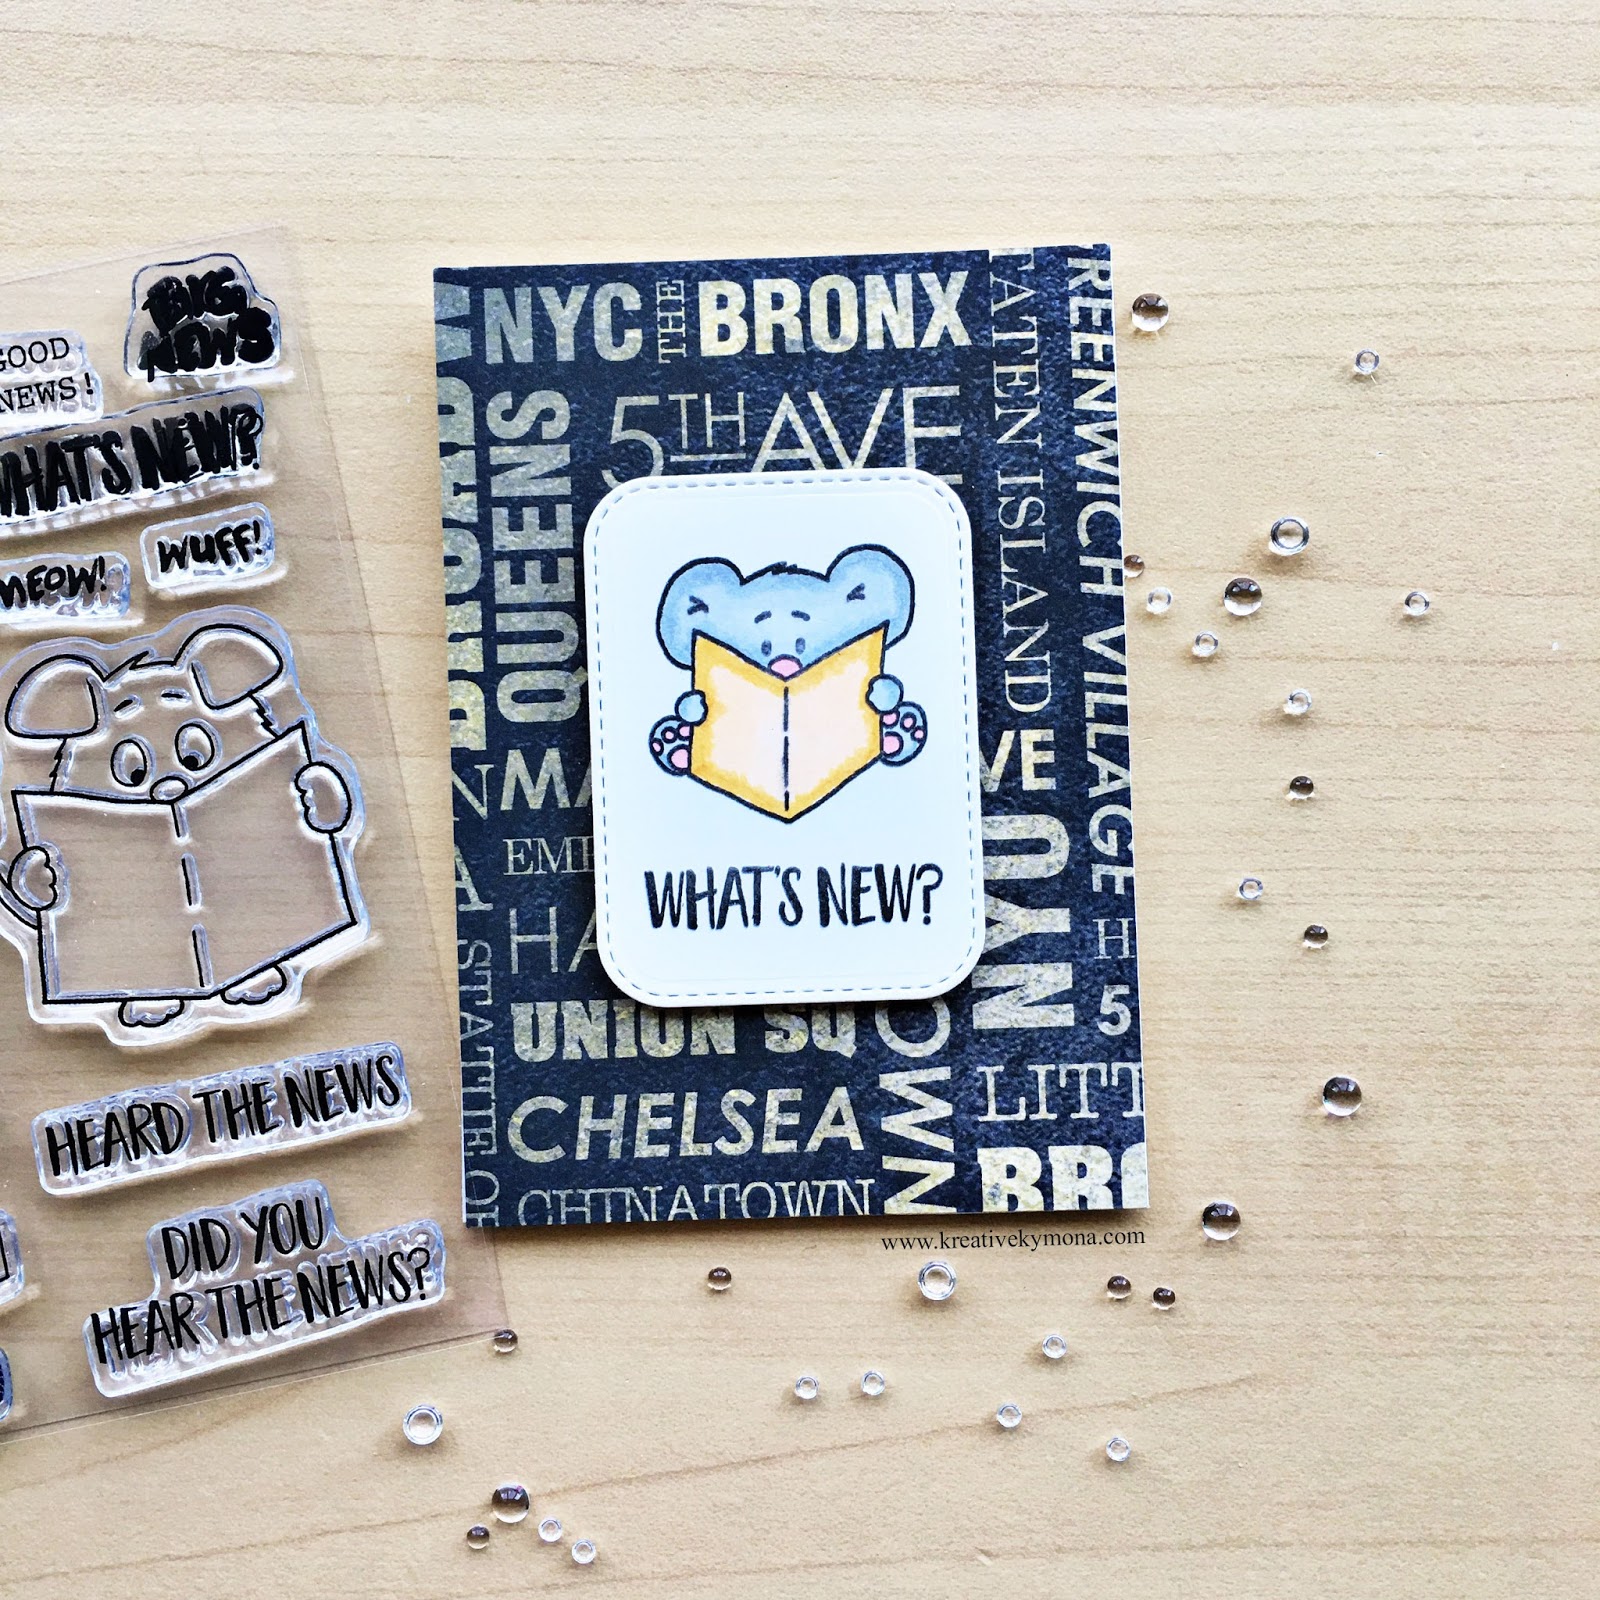
Hello everyone!! What's new? Kymona here from
Kreative Kymona as a guest designer today!! It's been awhile since I've guest designed so I'm so exited to be here with all of you today!!
Take a look at the card I created:
What is a mouse with a newspaper without the presence of NYC!! That is something you would see in my city, LOL!!!!
Here's how I created this card:
1. Cut the base card to 3.5 by 11...
Continue Reading